Follow these steps to create a test in TestGen and transfer it into Blackboard 6.x - 9.x.
Note: The files exported using the Blackboard 6.x - 9.x option may also be used to import test questions into other learning management systems such as ANGEL®.
On TestGen's Startup screen, click Web Test. Then choose the option for Blackboard and click OK.
Create the test, whether choosing questions from a testbank or adding your own questions.
Select "Export" from the File menu, select the option for Blackboard from the drop-down menu, and click OK.
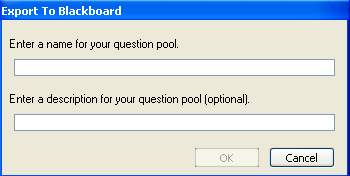
Enter a name for the question pool (description is optional), then click OK.

Review the filename and destination where the .zip file will be created and saved. (By default, the name matches its original .TST file and the location is the TestGen "Tests" folder.) You can change the destination, if desired, but note that you will need to locate this file during the import process into Blackboard.
Click Save.
Log into your Blackboard server.
Click on the Courses tab in the top navigation bar.
Click the course name that you would like to upload your test questions into.
Click the Control Panel button in the left navigation bar.
Click Pool Manager in the Assessment area or Pools in the Tests, Surveys, and Pools area. This is the area that your tests will be imported into. Having existing questions in this area will not affect the import.
Click the Import Pool button on the Pool Manager page.
Locate the .zip file to upload by clicking the Browse button. (Tip: It may be in the "tests" folder inside the TestGen folder.) Then click Open. The .zip file name and location display in the box next to the Browse button.
Click the Submit button.
Depending on the number of questions being imported, it may take several minutes for the entire question pool import to be transferred into your Blackboard course. A message displays when the process is complete.
The question pool you authored in TestGen can now be used in the same manner as question pools created directly within the Blackboard course.