Follow these steps to create a test in TestGen and transfer it into Canvas. Tests exported for Canvas are in QTI format and are compatible with other QTI-compliant systems as well.
Select "New test" from the File menu. On the Startup screen, click Web Test. Then choose the QTI (WebCT CE 6.x and WebCT Vista) option and click OK.
Create the test, whether choosing from a testbank or adding your own questions.
Select "Export" from the File menu, select the QTI (WebCT CE 6, WebCT Vista) option on the Export dialog box, and click OK.
The "Create a file for export" dialog box displays.
Save the test export file as a zip file. Review the filename and destination where the .zip file will be saved. (By default, the name matches its original .TST file and the saved location is the TestGen "Tests" folder.) You can change the destination, if desired, but note that you will later need to locate the file for importing it into WebCT.
Click Save.
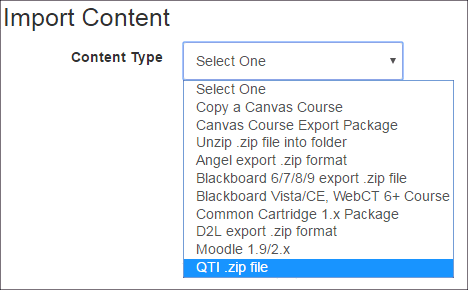
Log into your Canvas course, click "Settings" in the left menu bar, and select "Import Content into this Course" in the right menu bar.
Select "Import Content into this Course" in the right menu bar. Choose "QTI .zip file" from the drop-down menu.
Choose the file you exported from TestGen under "Source". Note: You do not need to select a "Default Question bank". The question bank name is set by TestGen when you exported the file in step 2.
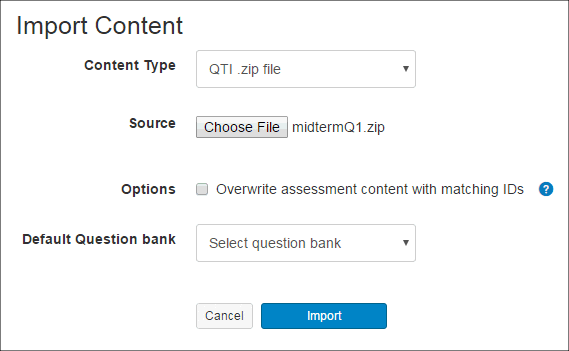
Click the Import button to upload your test.
Refer to the Canvas help for instructions on creating an assessment. When creating a quiz, you can view and select from existing questions in the question bank you imported.